# Axios
# Axios 是什么
Axios 是一个给予 Peromise 的 HTTP 库,可以用在浏览器和 node.js 中
第三方 Ajax 库
Axios 中文官方文档:http://www.axios-js.com/
或者电脑安装了 node.js 则可以使用 node.js 来进行下载 axios.js 到本地,这样可以提升访问的速度了。
步骤:
1 执行命令:下载 axios 到本地
npm install axios |
执行后下载到的地方一般在用户文件夹中的 node_modules 中
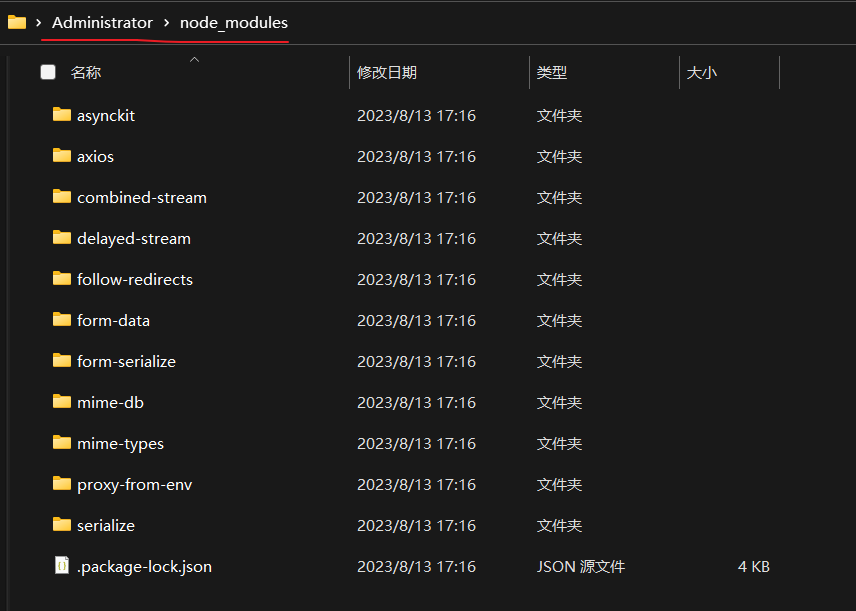
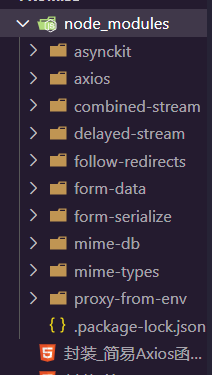
2 也可以直接在项目中打开终端执行命令下载可以直接使用。然后将下载的 axios 文件夹 剪切到项目中
注意:不要直接剪切走 node_modules 文件夹,这是在项目中执行命令生成的。
3 引入 axios 到 html 页面中
<!DOCTYPE html> | |
<html lang="en"> | |
<head> | |
<meta charset="UTF-8"> | |
<meta name="viewport" content="width=device-width, initial-scale=1.0, | |
minimun-scale=1.0,maximun-scale=1.0,user-scalable=no"> | |
<title>Document</title> | |
// 引入 axios | |
<script type="text/javaScript" src="./node_modules/axios/dist/axios.min.js"></script> | |
</head> | |
<body> | |
<script> | |
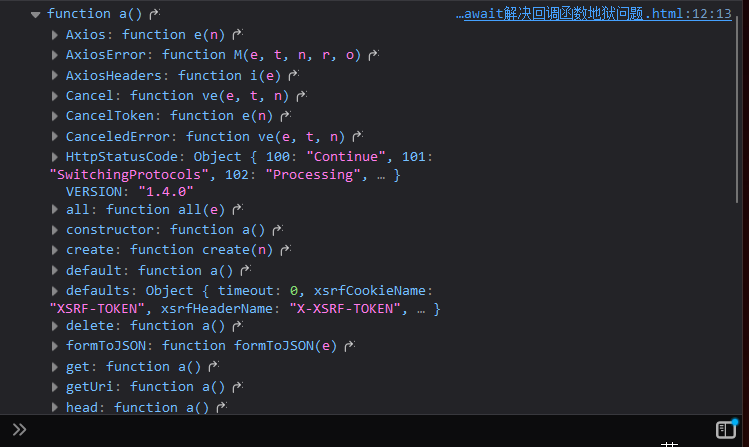
// 打印一下 axios 函数 看看是否引入成功了。 | |
console.log(axios) | |
</script> | |
</body> | |
</html> |
结果: OK ! 可以使用了
# Axios 的基本用法
引入 Axios 第三方库
<script type="text/javascript" src="https://unpkg.com/axios@1.4.0/dist/axios.min.js"></script> |
查看是否引入成功
<script> | |
console.log(axios) | |
</script> |
使用 Axios 发送请求:
使用结构:
url:请求地址
method:直接使用 axios 需要使用 method 指定请求方式如:post,get
headers:指定请求头信息
params:请求头携带的数据
data:请求体携带的数据
params 和 data 可以同时设置参数不会报错
timeout:设置请求超时时间
withCredentials:跨域请求是否携带 Cookie
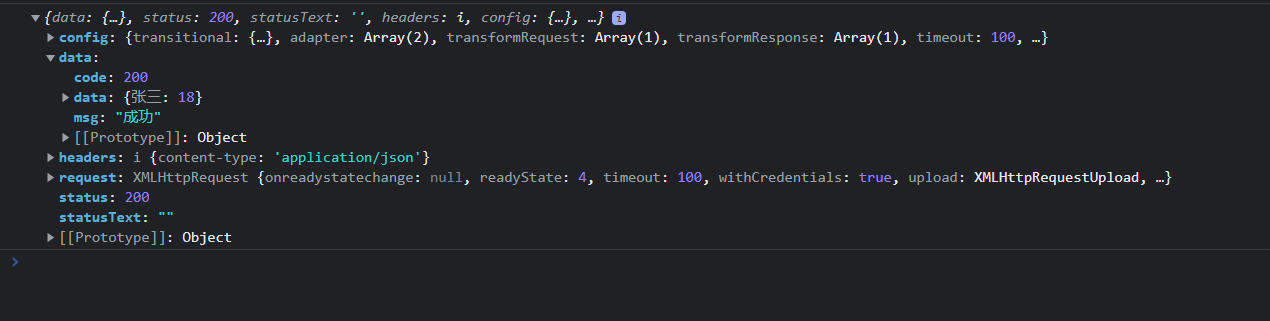
Axios 的超时报错效果:

const url = 'http://127.0.0.1:81/json' | |
axios(url,{ | |
method:'post', | |
// 请求时的头信息 | |
heaers:{ | |
'Content-Type':'application/json' | |
// 'Content-Type':'application/x-www-form-urlencoded' | |
}, | |
// 通过请求头携带的数据 | |
params:{ | |
name:'张三' | |
}, | |
// 通过请求体携带的数据,传递 JSON 数据 | |
data:{ | |
name:'李四', | |
age:18 | |
}, | |
// 传递 application/x-www-form-urlencoded 数据 | |
//data:'name = 张三李四 & amp;age=18' | |
// 设置超时时间,超出时间后报错 | |
timeout:10, | |
// 跨域是否携带 Cookie | |
withCredentials:true | |
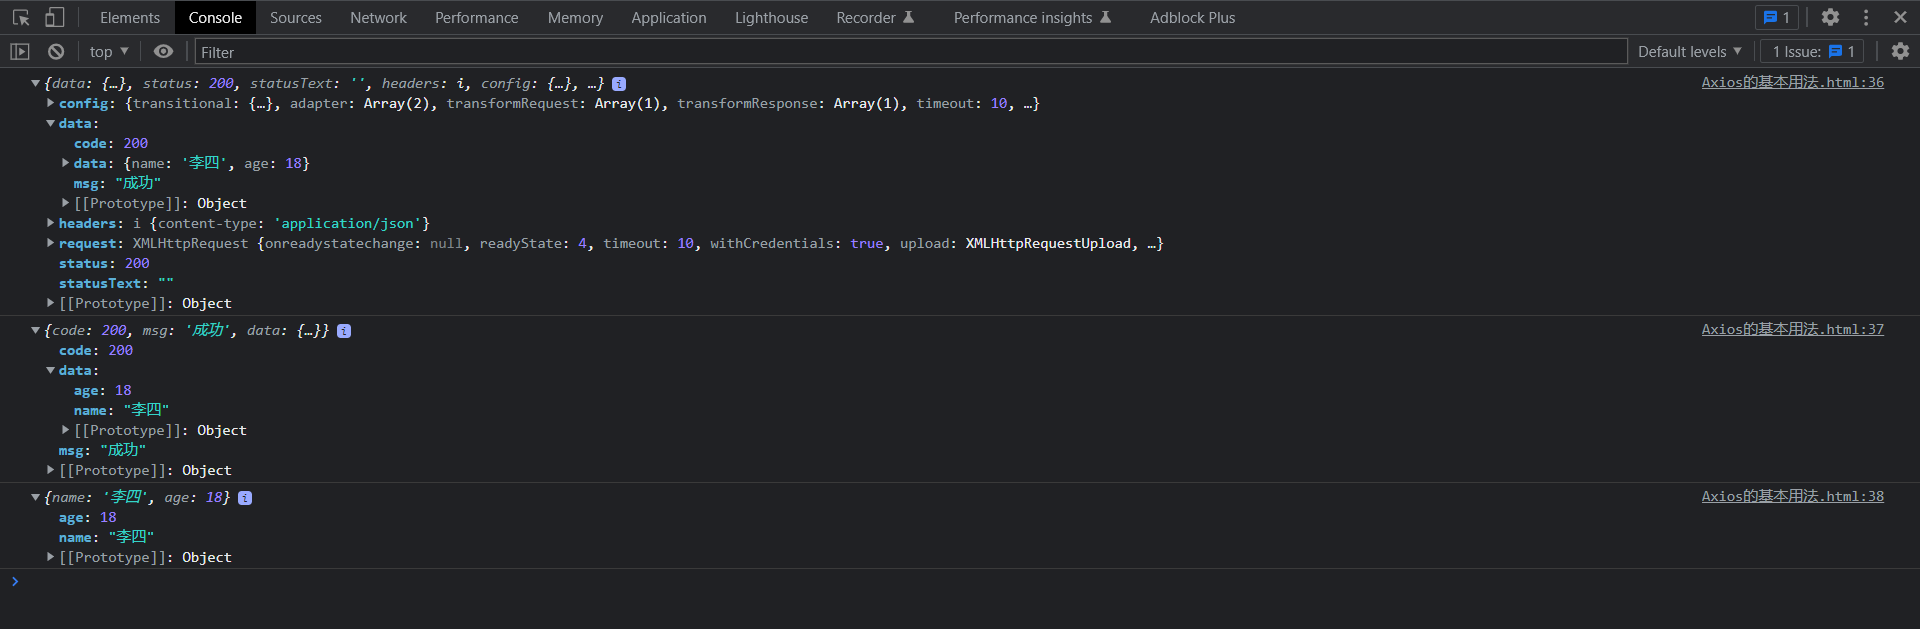
}).then(response=>{ | |
console.log(response) | |
console.log(response.data) | |
console.log(response.data.data) | |
}).catch(err=>{ | |
console.log(err) | |
}) |
效果:
使用 Axios 调用 get,post 请求方式:
可以不用写 headers
GET
const url1 = 'http://127.0.0.1:81/json-get' | |
axios.get(url1,{ | |
params:{ | |
name:'张三', | |
age:18 | |
}, | |
timeout:10, | |
withCredentials:true | |
}).then(response=>{ | |
console.log(response) | |
}).catch(err=>{ | |
console.log(err) | |
}) |
效果:
POST
还是同样的:'name = 张三 & age=18' 对应数据格式为:application/x-www-form-urlencoded
而 {name:' 张三 ',age:18} 对应数据格式为:appliction/json,如果后端需要 json 而传递了 x-www-form-urlencoded 则会报错 415
const url = 'http://127.0.0.1:81/json' | |
axios.post(url,'name=张三&age=18'/*{name:' 张三 ',age:18}*/) | |
.then(response=>{ | |
console.log(response) | |
}).catch(err=>{ | |
console.log(err) | |
}) |
# Content-Type 与 data-Type 的区别
content-Type:告诉服务器,我要发什么类型的数据。
data-Type:告诉服务器,我想要什么类型的数据,如果没有指定,那么会自动推断是返回 XML,还是 JSON,还是 script,还是 String。
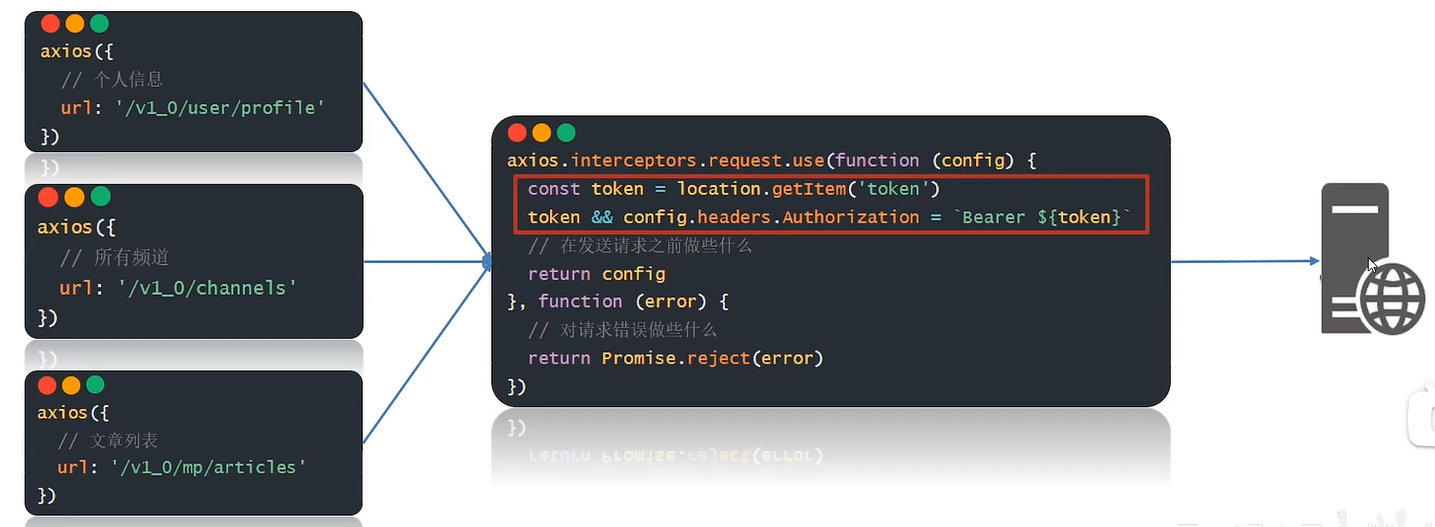
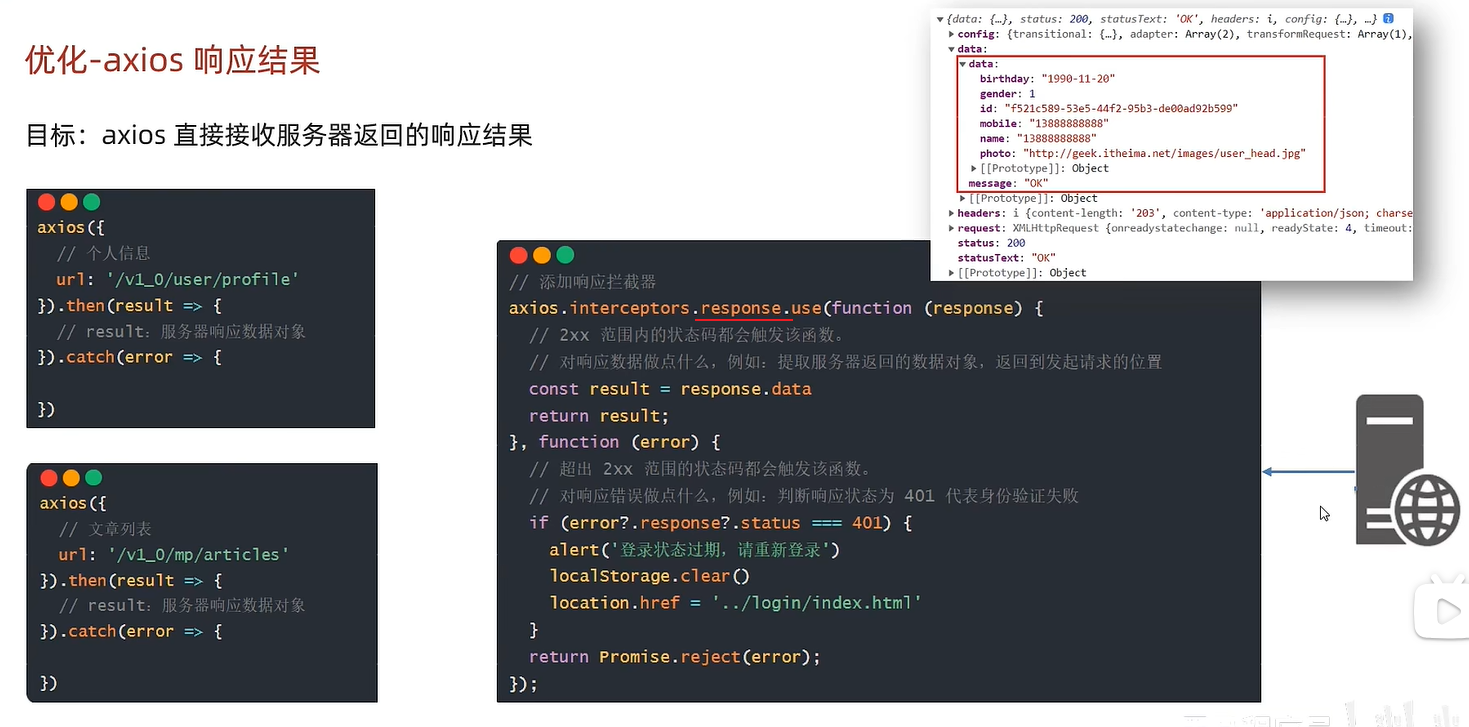
# axios 请求拦截器
axios 请求拦截器:发起请求之前,触发的配置函数,对 <font title=red> 请求参数 </font > 进行额外配置
// 做统一设置 | |
axios.interceptors.request.use(function(config) { | |
// 在发送请求之前做些什么 | |
// 统一携带 token 令牌字符串在请求头上 | |
const token = localStorage.getItem('token') | |
// 逻辑中断判断,如果有 token 则不进行设置,如果没有则进行设置 token | |
token && config.haeads.Authorization = `Bearer ${toke}` | |
// 在发送请求之前做些什么 | |
return config | |
},function(error) { | |
// 对请求错误做些什么 | |
return Promise.reject(error) | |
}) |
当我们在请求个人信息,所有频道,文章列表时都会先经过请求拦截器,然后访问服务器查看 token 是否合法,合法则返回数据到 axios 请求中 得到个人信息,所有频道数据,文章列表数据等。
总结:
- 什么是 axios 请求拦截器?
- 发起请求之前,调用一个 <font title=red> 函数 </font>,对 < font title=red > 请求参数 </font > 进行 < font title=red > 设置 </font>.
- axios 请求拦截器,什么时候使用?
- 有 <font title=red> 公共配置 </font > 和设置时,统一设置在请求拦截器中
# axios () 与 axios.get () 的区别
<span alt='solid'> 拿一个接口来做对比演示 </span>:
后端接口
@ApiOperation("添加角色接口") | |
@PostMapping("save") | |
// @RequestBody:不能使用 get 方式提交,传递 JSON 格式数据,把 json 格式数据封装到对象里面 | |
public Result saveRole(@RequestBody SysRole sys) { | |
return sysRoleService.save(sys) ? Result.ok() : Result.fail(); | |
} |
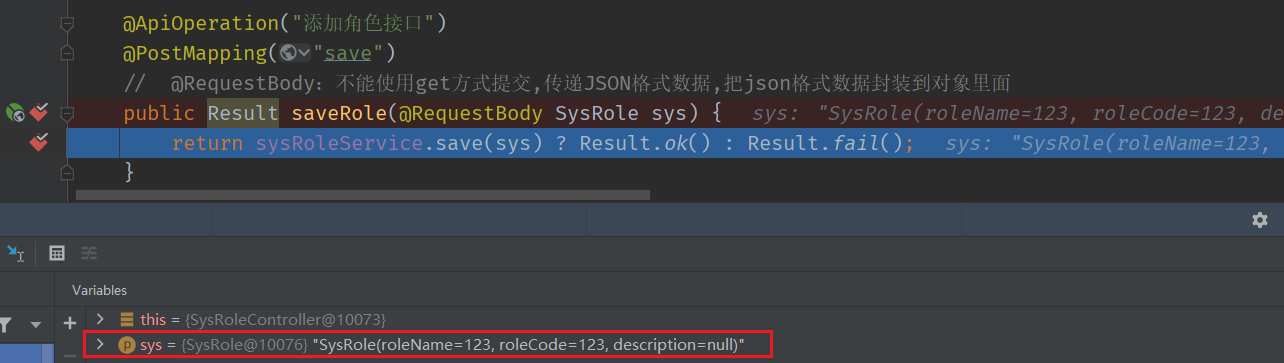
# 一,使用 axios () 进行发送请求
// 添加 | |
async saveRole(sys) { | |
// roleName: sys.roleName, roleCode: sys.roleCode | |
return await request({ | |
// 接口路径 | |
url: `${url}/save`, | |
// 请求方式 | |
method: 'post', | |
// 请求参数,传递 JSON 格式 | |
data: sys | |
}) | |
} |
结果:
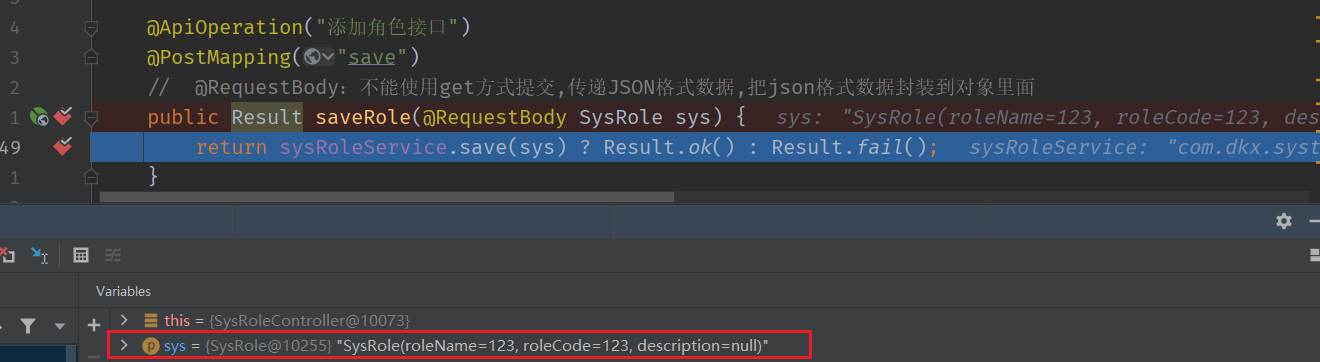
# 二,使用 axios.post () 进行发送请求
// 添加 | |
async saveRole(sys) { | |
// roleName: sys.roleName, roleCode: sys.roleCode | |
// 正确写法可以传递到后端接口值 | |
return await request.post(`${url}/save`, { roleName: sys.roleName, roleCode: sys.roleCode }) | |
// 错误写法不能传递到后端接口值 | |
// request.post(`${url}/save`, { sys: sys }) | |
} |
结果:
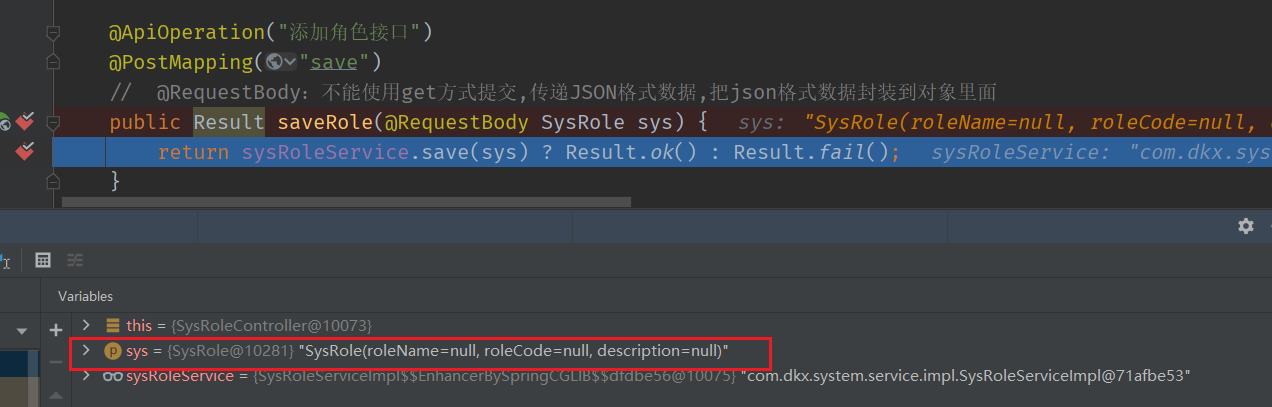
如果按照错误写法呢? 结果如下:
// 添加 | |
async saveRole(sys) { | |
// roleName: sys.roleName, roleCode: sys.roleCode | |
// 正确写法可以传递到后端接口值 | |
return await /* request.post(`${url}/save`, { roleName: sys.roleName, roleCode: sys.roleCode }) */ | |
// 错误写法不能传递到后端接口值 | |
request.post(`${url}/save`, { sys: sys }) | |
} |
结果:结果就是接收到了两个没有传递过来的值 null 了。