# seata 的部署和集成
# 一、部署 Seata 的 tc-server
# 1. 下载
首先我们要下载 seata-server 包,地址在 http😕/seata.io/zh-cn/blog/download.html
当然,课前资料也准备好了:

# 2. 解压
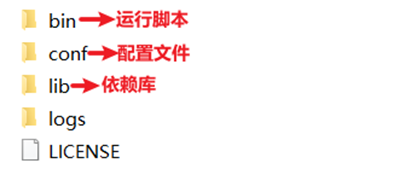
在非中文目录解压缩这个 zip 包,其目录结构如下:
# 3. 修改配置
修改 conf 目录下的 registry.conf 文件:

内容如下:
registry { | |
# tc 服务的注册中心类,这里选择 nacos,也可以是 eureka、zookeeper 等 | |
type = "nacos" | |
nacos { | |
# seata tc 服务注册到 nacos 的服务名称,可以自定义 | |
application = "seata-tc-server" | |
serverAddr = "127.0.0.1:8848" | |
group = "DEFAULT_GROUP" | |
namespace = "" | |
cluster = "SH" | |
username = "nacos" | |
password = "nacos" | |
} | |
} | |
config { | |
# 读取 tc 服务端的配置文件的方式,这里是从 nacos 配置中心读取,这样如果 tc 是集群,可以共享配置 | |
type = "nacos" | |
# 配置 nacos 地址等信息 | |
nacos { | |
serverAddr = "127.0.0.1:8848" | |
namespace = "" | |
group = "SEATA_GROUP" | |
username = "nacos" | |
password = "nacos" | |
dataId = "seataServer.properties" | |
} | |
} |
Seata-1.7.0 版本的配置如下:
找到 yml 配置文件
server: | |
port: 7091 | |
spring: | |
application: | |
name: seata-server | |
logging: | |
config: classpath:logback-spring.xml | |
file: | |
path: ${user.home}/logs/seata | |
extend: | |
logstash-appender: | |
destination: 127.0.0.1:4560 | |
kafka-appender: | |
bootstrap-servers: 127.0.0.1:9092 | |
topic: logback_to_logstash | |
console: | |
user: | |
username: seata | |
password: seata | |
seata: | |
config: | |
# support: nacos, consul, apollo, zk, etcd3 | |
type: nacos | |
nacos: | |
server-addr: 127.0.0.1:8848 | |
namespace: | |
# 改这里会报错 | |
group: SEATA_GROUP | |
username: nacos | |
password: nacos | |
##if use MSE Nacos with auth, mutex with username/password attribute | |
#access-key: "" | |
#secret-key: "" | |
data-id: seataServer.properties | |
registry: | |
# support: nacos, eureka, redis, zk, consul, etcd3, sofa | |
type: nacos | |
preferred-networks: 30.240.* | |
nacos: | |
application: seata-tc-server | |
server-addr: 127.0.0.1:8848 | |
group: DEFAULT_GROUP | |
namespace: | |
cluster: SH | |
username: nacos | |
password: nacos | |
##if use MSE Nacos with auth, mutex with username/password attribute | |
#access-key: "" | |
#secret-key: "" | |
store: | |
# support: file 、 db 、 redis | |
mode: db | |
db: | |
datasource: druid | |
db-type: mysql | |
driver-class-name: com.mysql.cj.jdbc.Driver | |
url: jdbc:mysql://127.0.0.1:13306/seata?useUnicode=true&rewriteBatchedStatements=true&serverTimezone=GMT | |
user: root | |
password: dkx. | |
min-conn: 5 | |
max-conn: 100 | |
global-table: global_table | |
branch-table: branch_table | |
lock-table: lock_table | |
distributed-lock-table: distributed_lock | |
query-limit: 100 | |
max-wait: 5000 | |
# server: | |
# service-port: 8091 #If not configured, the default is '${server.port} + 1000' | |
security: | |
secretKey: SeataSecretKey0c382ef121d778043159209298fd40bf3850a017 | |
tokenValidityInMilliseconds: 1800000 | |
ignore: | |
urls: /,/**/*.css,/**/*.js,/**/*.html,/**/*.map,/**/*.svg,/**/*.png,/**/*.ico,/console-fe/public/**,/api/v1/auth/login |
# 4. 在 nacos 添加配置
特别注意,为了让 tc 服务的集群可以共享配置,我们选择了 nacos 作为统一配置中心。因此服务端配置文件 seataServer.properties 文件需要在 nacos 中配好。
格式如下:
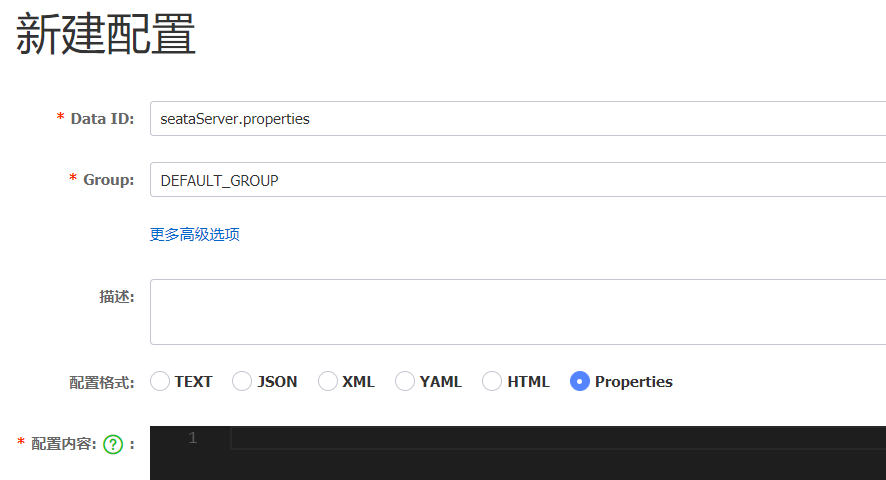
配置内容如下:
# 数据存储方式,db 代表数据库 | |
store.mode=db | |
store.db.datasource=druid | |
store.db.dbType=mysql | |
store.db.driverClassName=com.mysql.jdbc.Driver | |
store.db.url=jdbc:mysql://127.0.0.1:3306/seata?useUnicode=true&rewriteBatchedStatements=true | |
store.db.user=root | |
store.db.password=123 | |
store.db.minConn=5 | |
store.db.maxConn=30 | |
store.db.globalTable=global_table | |
store.db.branchTable=branch_table | |
store.db.queryLimit=100 | |
store.db.lockTable=lock_table | |
store.db.maxWait=5000 | |
# 事务、日志等配置 | |
server.recovery.committingRetryPeriod=1000 | |
server.recovery.asynCommittingRetryPeriod=1000 | |
server.recovery.rollbackingRetryPeriod=1000 | |
server.recovery.timeoutRetryPeriod=1000 | |
server.maxCommitRetryTimeout=-1 | |
server.maxRollbackRetryTimeout=-1 | |
server.rollbackRetryTimeoutUnlockEnable=false | |
server.undo.logSaveDays=7 | |
server.undo.logDeletePeriod=86400000 | |
# 客户端与服务端传输方式 | |
transport.serialization=seata | |
transport.compressor=none | |
# 关闭 metrics 功能,提高性能 | |
metrics.enabled=false | |
metrics.registryType=compact | |
metrics.exporterList=prometheus | |
metrics.exporterPrometheusPort=9898 |
其中的数据库地址、用户名、密码都需要修改成你自己的数据库信息。
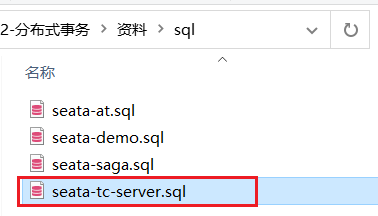
# 5. 创建数据库表
特别注意:tc 服务在管理分布式事务时,需要记录事务相关数据到数据库中,你需要提前创建好这些表。
新建一个名为 seata 的数据库,运行课前资料提供的 sql 文件:
这些表主要记录全局事务、分支事务、全局锁信息:
SET NAMES utf8mb4;
SET FOREIGN_KEY_CHECKS = 0;

-- ----------------------------
-- 分支事务表
-- ----------------------------
DROP TABLE IF EXISTS `branch_table`;
CREATE TABLE `branch_table`  (
  `branch_id` bigint(20) NOT NULL,
  `xid` varchar(128) CHARACTER SET utf8 COLLATE utf8_general_ci NOT NULL,
  `transaction_id` bigint(20) NULL DEFAULT NULL,
  `resource_group_id` varchar(32) CHARACTER SET utf8 COLLATE utf8_general_ci NULL DEFAULT NULL,
  `resource_id` varchar(256) CHARACTER SET utf8 COLLATE utf8_general_ci NULL DEFAULT NULL,
  `branch_type` varchar(8) CHARACTER SET utf8 COLLATE utf8_general_ci NULL DEFAULT NULL,
  `status` tinyint(4) NULL DEFAULT NULL,
  `client_id` varchar(64) CHARACTER SET utf8 COLLATE utf8_general_ci NULL DEFAULT NULL,
  `application_data` varchar(2000) CHARACTER SET utf8 COLLATE utf8_general_ci NULL DEFAULT NULL,
  `gmt_create` datetime(6) NULL DEFAULT NULL,
  `gmt_modified` datetime(6) NULL DEFAULT NULL,
  PRIMARY KEY (`branch_id`) USING BTREE,
  INDEX `idx_xid`(`xid`) USING BTREE
) ENGINE = InnoDB CHARACTER SET = utf8 COLLATE = utf8_general_ci ROW_FORMAT = Compact;

-- ----------------------------
-- 全局事务表
-- ----------------------------
DROP TABLE IF EXISTS `global_table`;
CREATE TABLE `global_table`  (
  `xid` varchar(128) CHARACTER SET utf8 COLLATE utf8_general_ci NOT NULL,
  `transaction_id` bigint(20) NULL DEFAULT NULL,
  `status` tinyint(4) NOT NULL,
  `application_id` varchar(32) CHARACTER SET utf8 COLLATE utf8_general_ci NULL DEFAULT NULL,
  `transaction_service_group` varchar(32) CHARACTER SET utf8 COLLATE utf8_general_ci NULL DEFAULT NULL,
  `transaction_name` varchar(128) CHARACTER SET utf8 COLLATE utf8_general_ci NULL DEFAULT NULL,
  `timeout` int(11) NULL DEFAULT NULL,
  `begin_time` bigint(20) NULL DEFAULT NULL,
  `application_data` varchar(2000) CHARACTER SET utf8 COLLATE utf8_general_ci NULL DEFAULT NULL,
  `gmt_create` datetime NULL DEFAULT NULL,
  `gmt_modified` datetime NULL DEFAULT NULL,
  PRIMARY KEY (`xid`) USING BTREE,
  INDEX `idx_gmt_modified_status`(`gmt_modified`, `status`) USING BTREE,
  INDEX `idx_transaction_id`(`transaction_id`) USING BTREE
) ENGINE = InnoDB CHARACTER SET = utf8 COLLATE = utf8_general_ci ROW_FORMAT = Compact;

SET FOREIGN_KEY_CHECKS = 1;
# 6. 启动 TC 服务
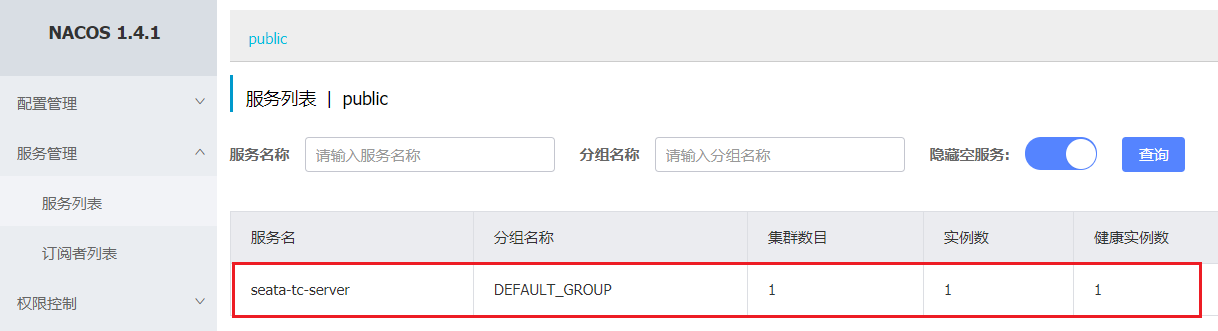
进入 bin 目录,运行其中的 seata-server.bat 即可:

启动成功后,seata-server 应该已经注册到 nacos 注册中心了。
打开浏览器,访问 nacos 地址:http://localhost:8848,然后进入服务列表页面,可以看到 seata-tc-server 的信息:
# 二、微服务集成 seata
# 1. 引入依赖
首先,我们需要在微服务中引入 seata 依赖:
<dependency> | |
<groupId>com.alibaba.cloud</groupId> | |
<artifactId>spring-cloud-starter-alibaba-seata</artifactId> | |
<exclusions> | |
<!-- 版本较低,1.3.0,因此排除 --> | |
<exclusion> | |
<artifactId>seata-spring-boot-starter</artifactId> | |
<groupId>io.seata</groupId> | |
</exclusion> | |
</exclusions> | |
</dependency> | |
<!--seata starter 采用 1.4.2 版本 --> | |
<dependency> | |
<groupId>io.seata</groupId> | |
<artifactId>seata-spring-boot-starter</artifactId> | |
<version>${seata.version}</version> | |
</dependency> |
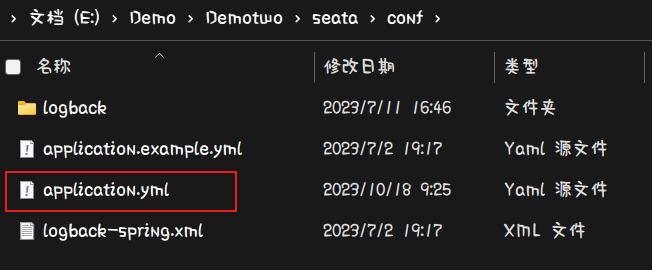
# 2. 修改配置文件
需要修改 application.yml 文件,添加一些配置:
seata: | |
registry: # TC 服务注册中心的配置,微服务根据这些信息去注册中心获取 tc 服务地址 | |
# 参考 tc 服务自己的 registry.conf 中的配置 | |
type: nacos | |
nacos: # tc | |
server-addr: 127.0.0.1:8848 | |
namespace: "" | |
group: DEFAULT_GROUP | |
application: seata-tc-server # tc 服务在 nacos 中的服务名称 | |
cluster: SH | |
tx-service-group: seata-demo # 事务组,根据这个获取 tc 服务的 cluster 名称 | |
service: | |
vgroup-mapping: # 事务组与 TC 服务 cluster 的映射关系 | |
seata-demo: SH |
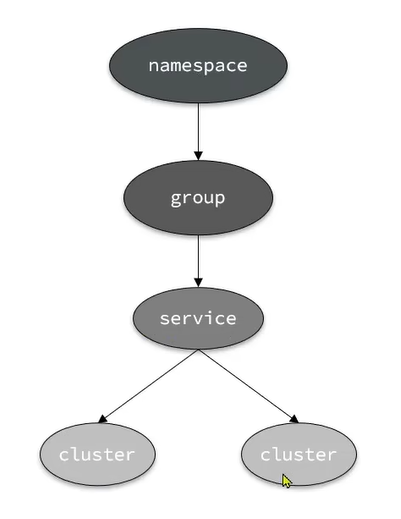
要从 nacos 中找到一个服务,我需要知道什么信息。
我们从 nacos 找到一个服务至少需要知道 namespace,group,application-name 和 cluster

总结:
nacos 服务名称组成包括?
- namespace + group + serviceName + cluster
seata 客户端获取 tc 的 cluster 名称方式
- 以 tx-group-service 的值为 key 到 vgroupMapping 中查找
# 三、TC 服务的高可用和异地容灾
# 1. 模拟异地容灾的 TC 集群
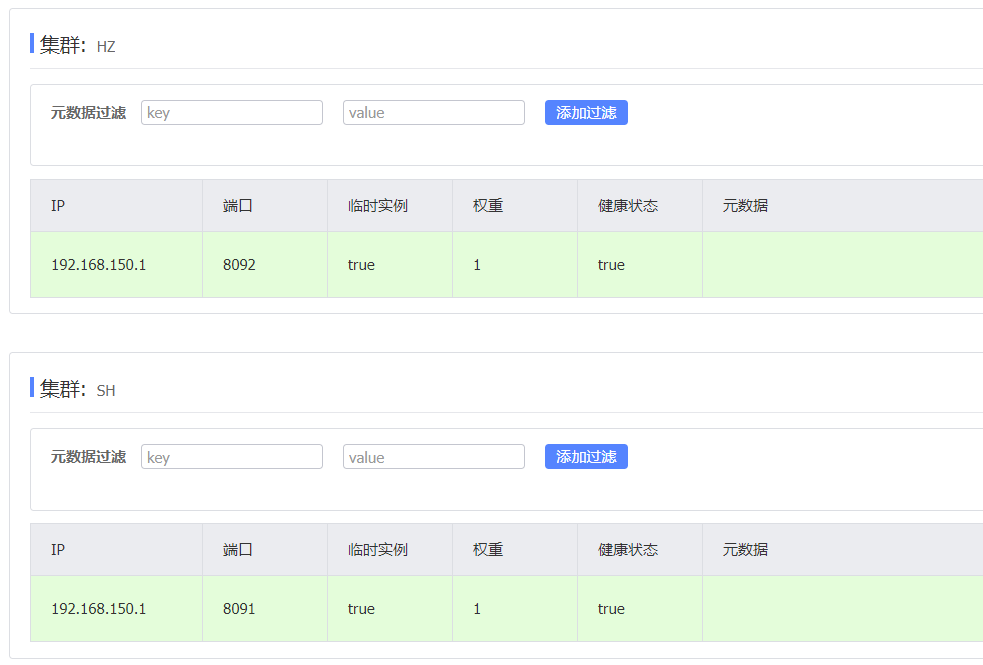
计划启动两台 seata 的 tc 服务节点:
| 节点名称 | ip 地址 | 端口号 | 集群名称 |
|---|---|---|---|
| seata | 127.0.0.1 | 8091 | SH |
| seata2 | 127.0.0.1 | 8092 | HZ |
之前我们已经启动了一台 seata 服务,端口是 8091,集群名为 SH。
现在,将 seata 目录复制一份,起名为 seata2
修改 seata2/conf/registry.conf 内容如下:
registry { | |
# tc 服务的注册中心类,这里选择 nacos,也可以是 eureka、zookeeper 等 | |
type = "nacos" | |
nacos { | |
# seata tc 服务注册到 nacos 的服务名称,可以自定义 | |
application = "seata-tc-server" | |
serverAddr = "127.0.0.1:8848" | |
group = "DEFAULT_GROUP" | |
namespace = "" | |
cluster = "HZ" | |
username = "nacos" | |
password = "nacos" | |
} | |
} | |
config { | |
# 读取 tc 服务端的配置文件的方式,这里是从 nacos 配置中心读取,这样如果 tc 是集群,可以共享配置 | |
type = "nacos" | |
# 配置 nacos 地址等信息 | |
nacos { | |
serverAddr = "127.0.0.1:8848" | |
namespace = "" | |
group = "SEATA_GROUP" | |
username = "nacos" | |
password = "nacos" | |
dataId = "seataServer.properties" | |
} | |
} |
Seata-1.7.0 版本的配置如下:
找到 yml 配置文件

server: | |
port: 7091 | |
spring: | |
application: | |
name: seata-server | |
logging: | |
config: classpath:logback-spring.xml | |
file: | |
path: ${user.home}/logs/seata | |
extend: | |
logstash-appender: | |
destination: 127.0.0.1:4560 | |
kafka-appender: | |
bootstrap-servers: 127.0.0.1:9092 | |
topic: logback_to_logstash | |
console: | |
user: | |
username: seata | |
password: seata | |
seata: | |
config: | |
# support: nacos, consul, apollo, zk, etcd3 | |
type: nacos | |
nacos: | |
server-addr: 127.0.0.1:8848 | |
namespace: | |
# 改这里会报错 | |
group: SEATA_GROUP | |
username: nacos | |
password: nacos | |
##if use MSE Nacos with auth, mutex with username/password attribute | |
#access-key: "" | |
#secret-key: "" | |
data-id: seataServer.properties | |
registry: | |
# support: nacos, eureka, redis, zk, consul, etcd3, sofa | |
type: nacos | |
preferred-networks: 30.240.* | |
nacos: | |
application: seata-tc-server | |
server-addr: 127.0.0.1:8848 | |
group: DEFAULT_GROUP | |
namespace: | |
cluster: HZ # 修改集群地址 | |
username: nacos | |
password: nacos | |
##if use MSE Nacos with auth, mutex with username/password attribute | |
#access-key: "" | |
#secret-key: "" | |
store: | |
# support: file 、 db 、 redis | |
mode: db | |
db: | |
datasource: druid | |
db-type: mysql | |
driver-class-name: com.mysql.cj.jdbc.Driver | |
url: jdbc:mysql://127.0.0.1:13306/seata?useUnicode=true&rewriteBatchedStatements=true&serverTimezone=GMT | |
user: root | |
password: dkx. | |
min-conn: 5 | |
max-conn: 100 | |
global-table: global_table | |
branch-table: branch_table | |
lock-table: lock_table | |
distributed-lock-table: distributed_lock | |
query-limit: 100 | |
max-wait: 5000 | |
# server: | |
# service-port: 8091 #If not configured, the default is '${server.port} + 1000' | |
security: | |
secretKey: SeataSecretKey0c382ef121d778043159209298fd40bf3850a017 | |
tokenValidityInMilliseconds: 1800000 | |
ignore: | |
urls: /,/**/*.css,/**/*.js,/**/*.html,/**/*.map,/**/*.svg,/**/*.png,/**/*.ico,/console-fe/public/**,/api/v1/auth/login |
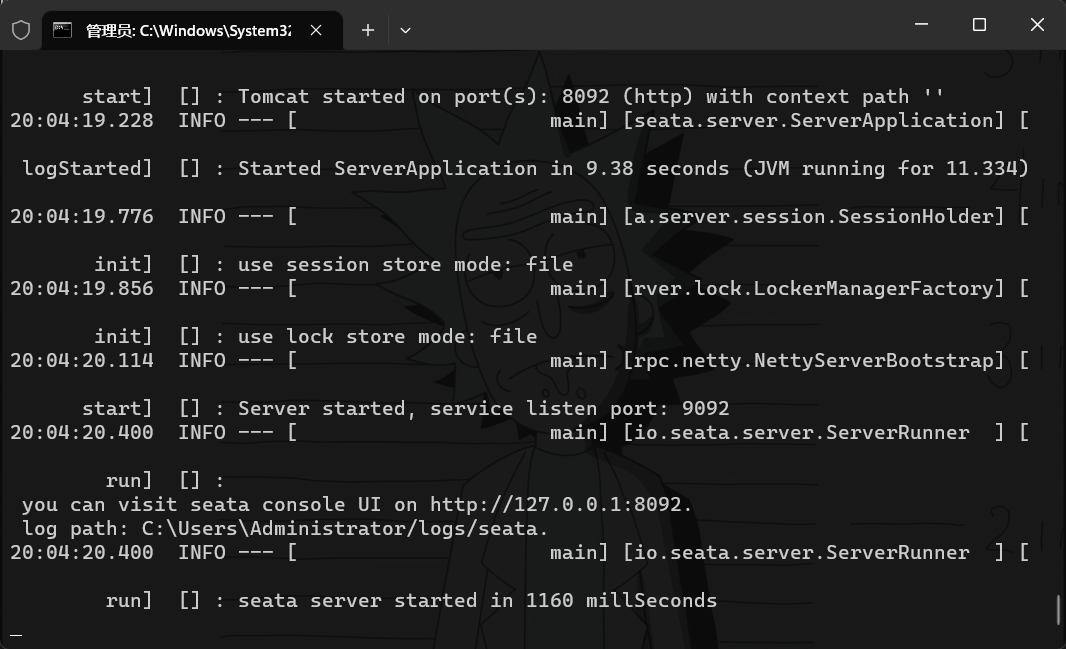
进入 seata2/bin 目录,然后运行命令:
seata-server.bat -p 8092 |
1.7.0 版本实在不行就配置文件里修改端口号

打开 nacos 控制台,查看服务列表:

点进详情查看:
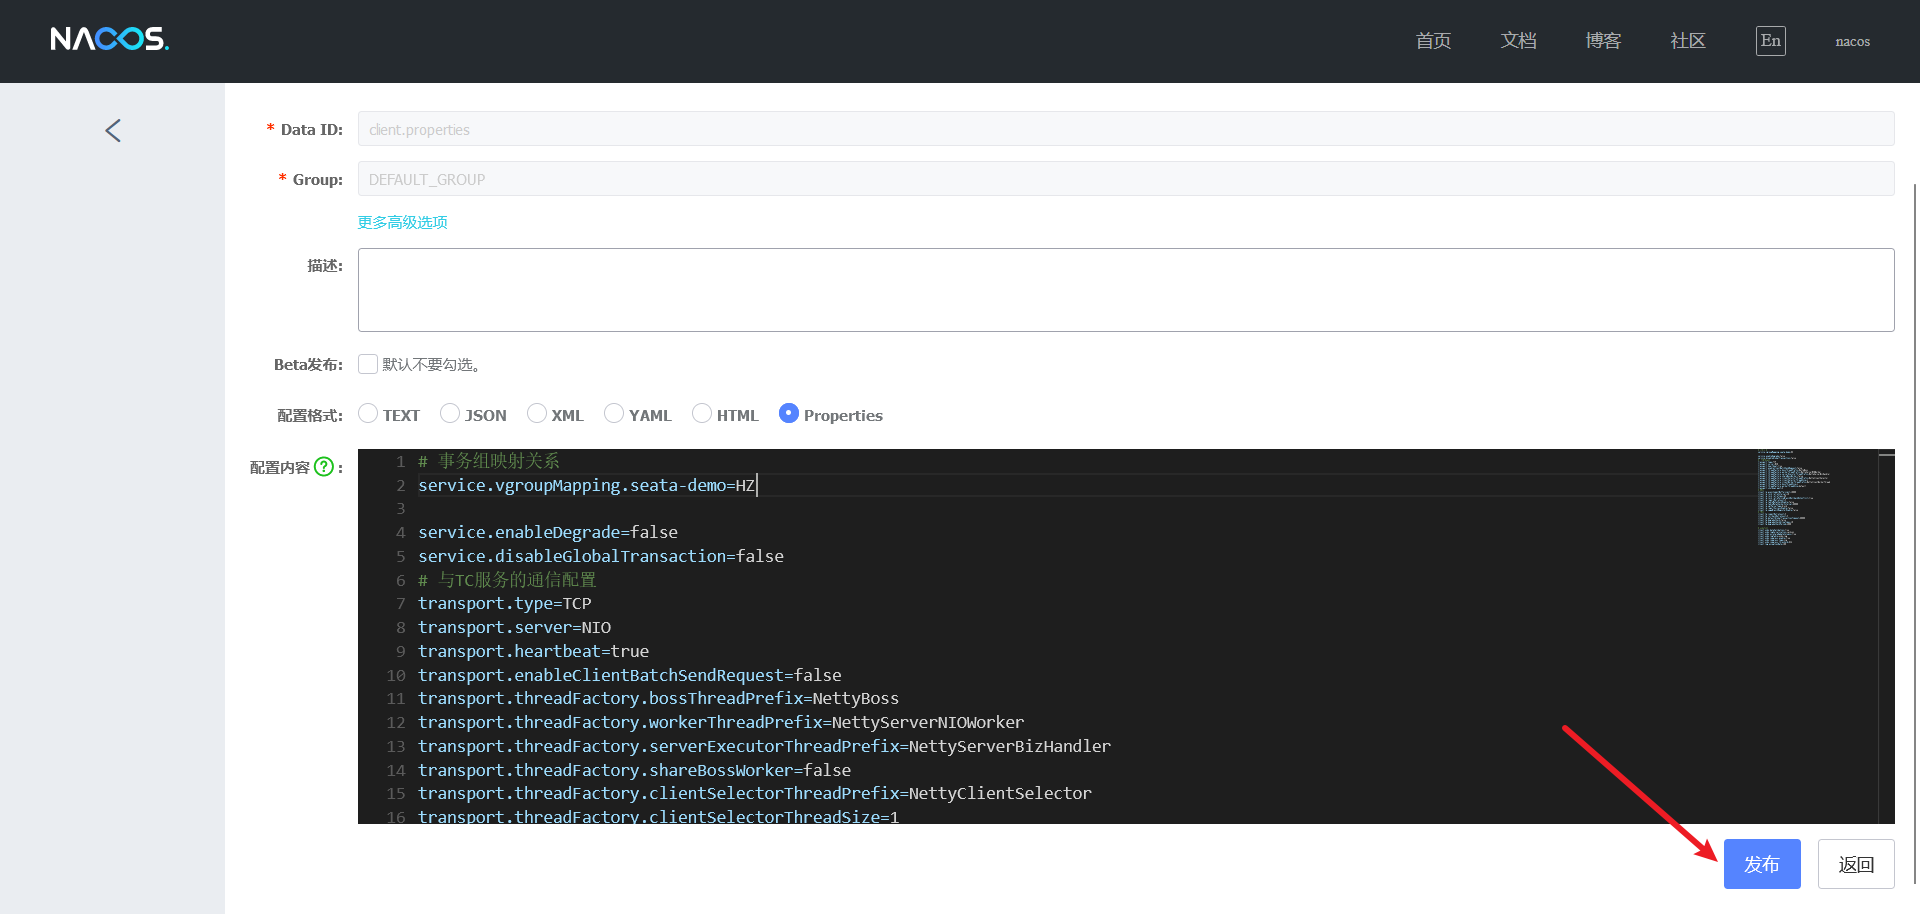
# 2. 将事务组映射配置到 nacos
接下来,我们需要将 tx-service-group 与 cluster 的映射关系都配置到 nacos 配置中心。
新建一个配置:
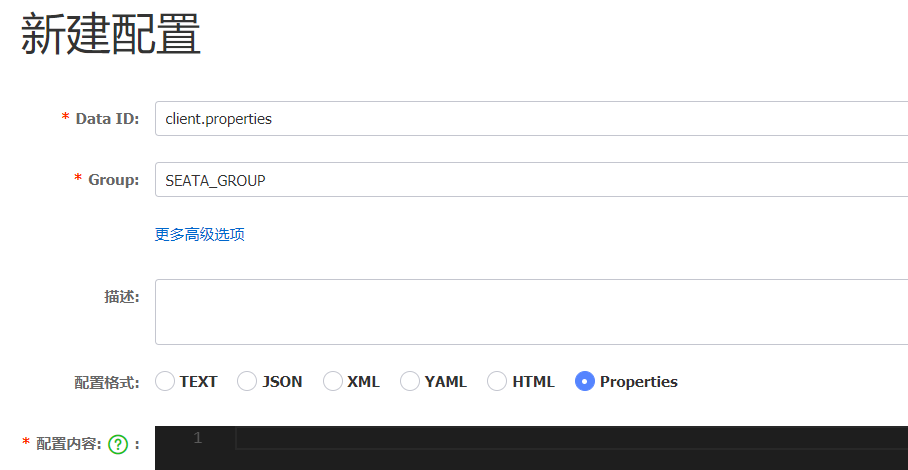
配置的内容如下:
# 事务组映射关系 | |
service.vgroupMapping.seata-demo=SH | |
service.enableDegrade=false | |
service.disableGlobalTransaction=false | |
# 与 TC 服务的通信配置 | |
transport.type=TCP | |
transport.server=NIO | |
transport.heartbeat=true | |
transport.enableClientBatchSendRequest=false | |
transport.threadFactory.bossThreadPrefix=NettyBoss | |
transport.threadFactory.workerThreadPrefix=NettyServerNIOWorker | |
transport.threadFactory.serverExecutorThreadPrefix=NettyServerBizHandler | |
transport.threadFactory.shareBossWorker=false | |
transport.threadFactory.clientSelectorThreadPrefix=NettyClientSelector | |
transport.threadFactory.clientSelectorThreadSize=1 | |
transport.threadFactory.clientWorkerThreadPrefix=NettyClientWorkerThread | |
transport.threadFactory.bossThreadSize=1 | |
transport.threadFactory.workerThreadSize=default | |
transport.shutdown.wait=3 | |
# RM 配置 | |
client.rm.asyncCommitBufferLimit=10000 | |
client.rm.lock.retryInterval=10 | |
client.rm.lock.retryTimes=30 | |
client.rm.lock.retryPolicyBranchRollbackOnConflict=true | |
client.rm.reportRetryCount=5 | |
client.rm.tableMetaCheckEnable=false | |
client.rm.tableMetaCheckerInterval=60000 | |
client.rm.sqlParserType=druid | |
client.rm.reportSuccessEnable=false | |
client.rm.sagaBranchRegisterEnable=false | |
# TM 配置 | |
client.tm.commitRetryCount=5 | |
client.tm.rollbackRetryCount=5 | |
client.tm.defaultGlobalTransactionTimeout=60000 | |
client.tm.degradeCheck=false | |
client.tm.degradeCheckAllowTimes=10 | |
client.tm.degradeCheckPeriod=2000 | |
# undo 日志配置 | |
client.undo.dataValidation=true | |
client.undo.logSerialization=jackson | |
client.undo.onlyCareUpdateColumns=true | |
client.undo.logTable=undo_log | |
client.undo.compress.enable=true | |
client.undo.compress.type=zip | |
client.undo.compress.threshold=64k | |
client.log.exceptionRate=100 |
# 3. 微服务读取 nacos 配置
接下来,需要修改每一个微服务的 application.yml 文件,让微服务读取 nacos 中的 client.properties 文件:
seata: | |
config: | |
type: nacos | |
nacos: | |
server-addr: 127.0.0.1:8848 | |
username: nacos | |
password: nacos | |
group: SEATA_GROUP # 这里和 nacos 添加配置文件中的 group 要一致 | |
data-id: client.properties |
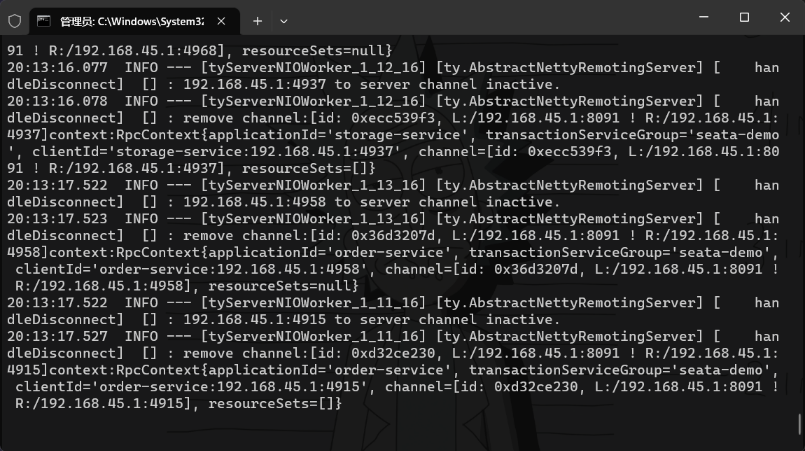
重启微服务,现在微服务到底是连接 tc 的 SH 集群,还是 tc 的 HZ 集群,都统一由 nacos 的 client.properties 来决定了。
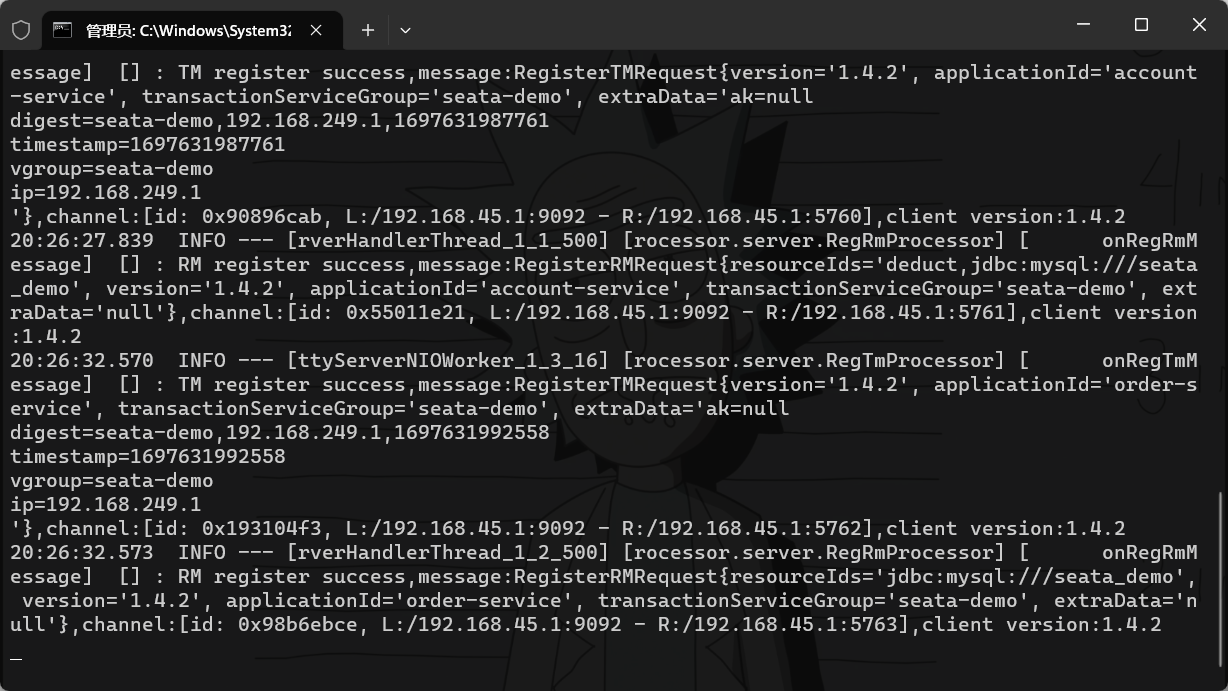
8092
7091
可以看到 8092 没有任何人注册,而是都注册到了 7091 上了
我们去 nacos 控制台中对刚才创建的配置文件的集群地址进行修改为:HZ

在 8092 的 seata 启动窗口就可以看到如下信息:
此时服务就全部都切换到了 8092 这个 seata 服务上了,7091 就没用了甚至于停掉也没有问题