# 阻塞队列 - 单锁实现 - 阻塞线程 2
使用 ReentrantLock 和 Condition 来实现一个简单的线程安全的队列。以下是代码的详细解释
# 代码:
/* | |
1. synchronized 关键字,功能少 | |
2. ReentrantLock 可重入锁,功能多 | |
*/ | |
public class TestThreadUnsafe { | |
private final String[] array = new String[10]; | |
private int tail = 0; | |
private int size = 0; | |
ReentrantLock lock = new ReentrantLock(); // 锁对象 | |
Condition tailWaits = lock.newCondition(); // 条件变量对象 集合 | |
public void offer(String e) throws InterruptedException { | |
lock.lockInterruptibly(); // 加锁 (可以在阻塞状态随时打断) | |
try { | |
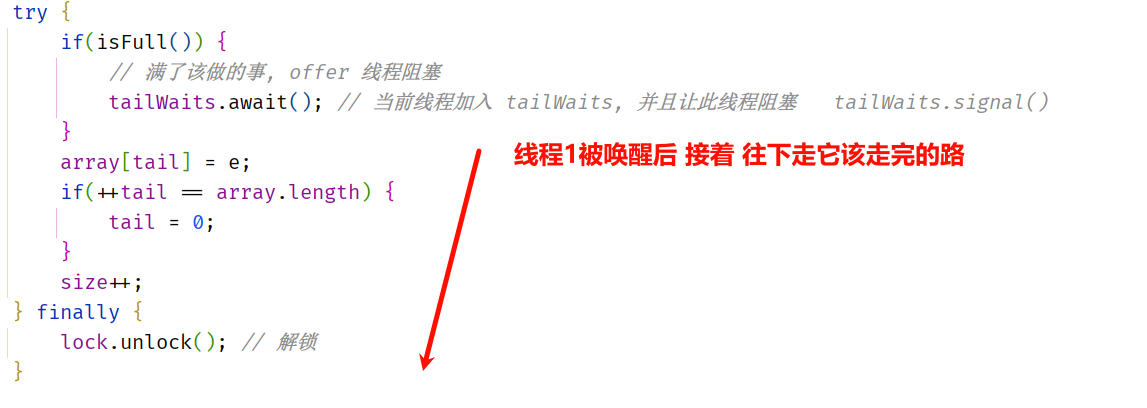
if(isFull()) { | |
// 满了该做的事,offer 线程阻塞 | |
tailWaits.await(); // 当前线程加入 tailWaits, 并且让此线程阻塞 tailWaits.signal () | |
} | |
array[tail] = e; | |
if(++tail == array.length) { | |
tail = 0; | |
} | |
size++; | |
} finally { | |
lock.unlock(); // 解锁 | |
} | |
} | |
private boolean isFull() { | |
return size == array.length; | |
} | |
@Override | |
public String toString() { | |
return Arrays.toString(array); | |
} | |
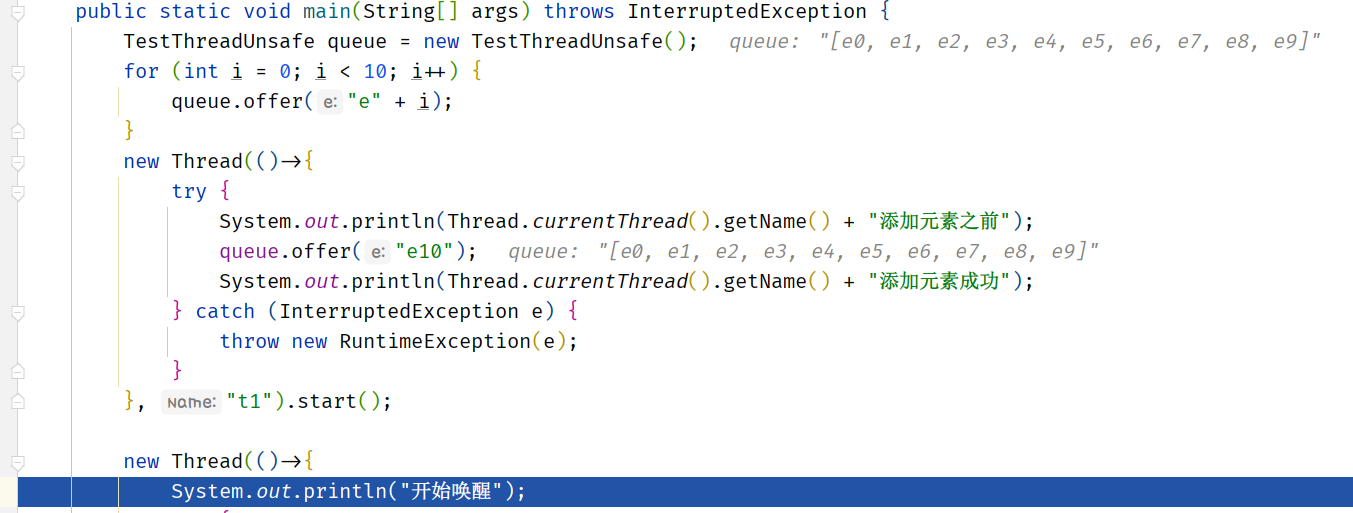
public static void main(String[] args) throws InterruptedException { | |
TestThreadUnsafe queue = new TestThreadUnsafe(); | |
for (int i = 0; i < 10; i++) { | |
queue.offer("e" + i); | |
} | |
new Thread(()->{ | |
try { | |
System.out.println(Thread.currentThread().getName() + "添加元素之前"); | |
queue.offer("e10"); | |
System.out.println(Thread.currentThread().getName() + "添加元素成功"); | |
} catch (InterruptedException e) { | |
throw new RuntimeException(e); | |
} | |
}, "t1").start(); | |
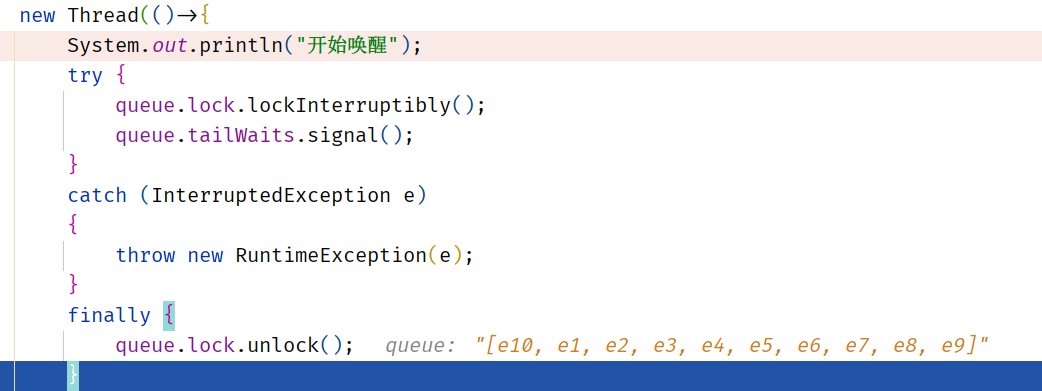
new Thread(()->{ | |
System.out.println("开始唤醒"); | |
try { | |
queue.lock.lockInterruptibly(); | |
queue.tailWaits.signal(); | |
} | |
catch (InterruptedException e) | |
{ | |
throw new RuntimeException(e); | |
} | |
finally { | |
queue.lock.unlock(); | |
} | |
}, "t2").start(); | |
} | |
} |
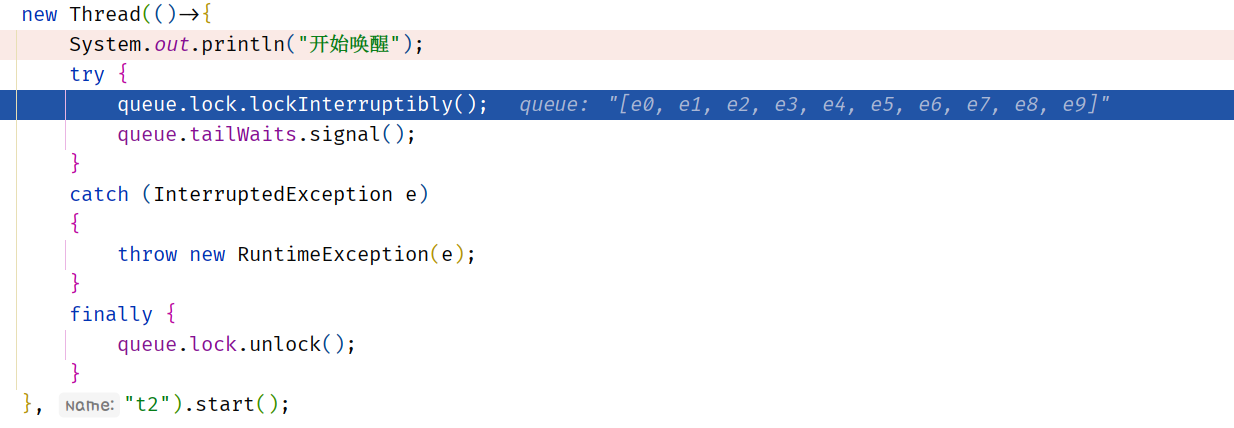
# 断点分析:
我们进行断点查看:
将断掉标记到 74 行代码处
当轮到 线程 2 执行时 线程 1 是被 阻塞了
所以控制台打印了
Connected to the target VM, address: '127.0.0.1:11310', transport: 'socket'
t1添加元素之前
然后 我们在 线程 2 处打了断点 所以 我们直接往下执行程序,打印如下:
Connected to the target VM, address: '127.0.0.1:11310', transport: 'socket'
t1添加元素之前
开始唤醒
走到下图这个位置的时候 线程 2 拿到锁
PS:线程 1 拿到锁的时候 由于 wait () 函数 将 线程 1 阻塞了 会 主动的 释放锁
再往下执行的时候 释放了 tailWaits 中 的锁 进行 对 Condition 里面的阻塞 线程的唤醒
PS:这里只是下达了这样的指令 并没有 真正的 唤醒 线程 1 需要 释放锁后 才会 真正唤醒 线程 1
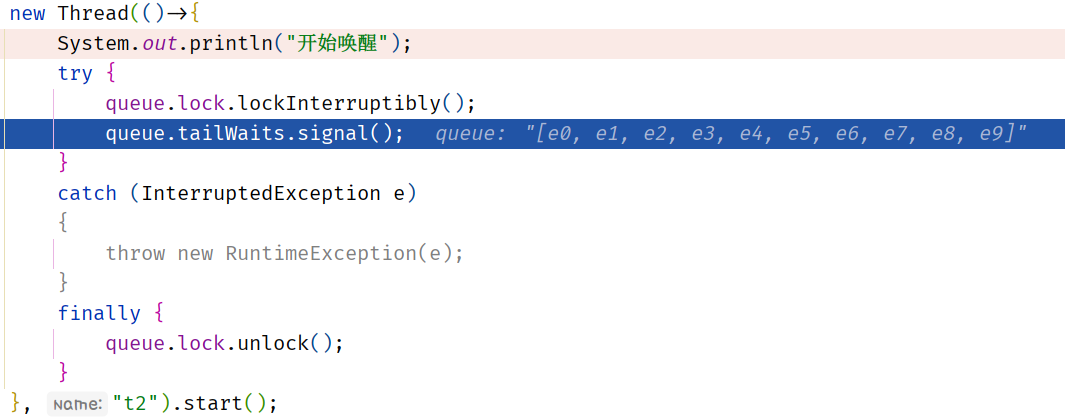
然后再往下执行 线程 2 释放锁
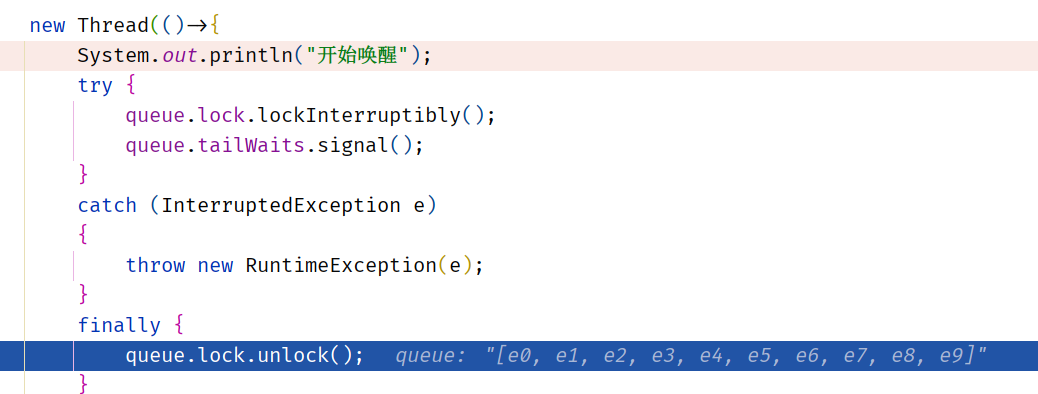
PS:当线程 2 释放锁后 才会 唤醒 线程 1 此时 线程 1 被唤醒 然后 接着 上次的 isFull 往下执行程序
线程 2 释放完成后 ,线程 1 往下执行 完毕 此时 e0 的地方就会被赋值为 e10 了